Autoboot explained pt2
Practical example to understand how autoboot works in two different modes:
- classic autoboot for C128
- autoboot that works for C128’s C64 mode
As mentioned in the previous article, autoboot is a feature introduced in the Commodore 128. Therefore, it is not possible to use it on the C64…
It’s actually possible, but it can only be used in the C64 mode offered by the C128. The usability of this feature is therefore very limited, but it’s interesting to see it from a technical standpoint. Now we’ll see how to implement autoboot in both pure C128 mode and C64 mode.
Autoboot C128
As mentioned, the disk that will allow autoboot must be modified so that the C128, after switching on (or when using the BOOT command), is able to start the desired program.
ⓘ Note: Code here was obtained by modifying examples available online, the resources are listed at the bottom of the page
The simplest version involves creating an autoboot disk that launches a program.
The autoboot should be generated with this structure:
0000 43 42 4D 00 00 00 00 41   CBM....A
0008 55 54 4F 42 4F 4F 54 20   UTOBOOT
0010 46 4F 52 20 43 31 32 38   FOR C128
0018 00 00 A2 20 A0 0B 4C A5   ........
0020 AF 52 55 4E 22 41 55 54   .RUN"AUT
0028 4F 42 4F 4F 54 2D 43 31   OBOOT-C1
0030 32 38 22 00 00 00 00 00   28".....
To generate the boot sector we need to start from a blank disk (with VICE you can create it from the File menu) and then we can use the BASIC/ML program below:
10 REM CREATE BOOT SECTOR
20 DCLEAR: OPEN 15, 8, 15: OPEN 2, 8, 2, "#": PRINT# 15, "B-P:2, 0"
30 READ D$: D = DEC(D$): IF D>255 THEN 50
40 PRINT# 2, CHR$(D); : GOTO 30
50 PRINT# 15, "U2;2, 0, 1, 0"
60 PRINT DS$ : CLOSE 2 : CLOSE 15
70 DATA 43, 42, 4D, 00, 00, 00, 00
80 DATA 41, 55, 54, 4F, 42, 4F, 4F, 54, 20, 46, 4F, 52, 20, 43, 31, 32, 38
90 DATA 00, 00, A2, 20, A0, 0B, 4C, A5, AF, 52, 55, 4E
100 DATA 22, 41, 55, 54, 4F, 42, 4F, 4F, 54, 2D, 43, 31, 32, 38, 22, 00
1000 DATA 100
Description
20 DCLEAR: OPEN 15, 8, 15: OPEN 2, 8, 2, "#": PRINT# 15, "B-P:2, 0"
- DCLEAR: clears the drive’s directory buffer (useful for starting from a “clean” state)
- OPEN 15, 8, 15: opens the command channel (15) to drive 8.
- OPEN 2, 8, 2, “#”: opens the data channel (2) to drive 8, raw mode (“#” means physical sector).
- PRINT# 15, “BP:2, 0”: command to the drive to position the head to the boot sector.
- “BP” means “Block Position”.
- Parameters 2, 0 = channel 2, sector 0 of the boot track (which is usually track 1, sector 0 in the C128).
30 READ D$: D = DEC(D$): IF D>255 THEN 50
- READ D$: reads a value from DATA, as a string (can contain hexadecimal or numeric values).
- D = DEC(D$): converts from string (hexadecimal or decimal) to decimal number.
- IF D>255 THEN 50: if the value is greater than 255 then end of actual data, skip to line 50.
40 PRINT# 2, CHR$(D); : GOTO 30
Send the converted byte (CHR$(D)) to data channel 2 (thus writing it directly to the sector). The semicolon ; avoids inserting the CR/LF terminator. Then return to line 30 to read the next byte.
50 PRINT# 15, "U2;2, 0, 1, 0"
- “U2” is the drive command to write a block (Block Write).
- 2 = open data channel
- 0, 1, 0 = track 1, sector 0 (standard boot sector for the C128)
In practice, here the drive physically writes the sector with the data just sent.
60 PRINT DS$ : CLOSE 2 : CLOSE 15
- PRINT DS$: shows the drive status (DS$ contains the status message)
- CLOSE 2 / CLOSE 15: closes open channels
70 DATA 43, 42, 4D, 00, 00, 00, 00
43 42 4D in ASCII is “CBM”, the boot block identifier. The four bytes after 00 are:
- the address (16 bit) in which to store other data read from disk
- the bank in which to store the data
- the number of sectors to read
Since the number of sectors to read is 0, the previous three bytes are not significant.
80 DATA 41, 55, 54, 4F, 42, 4F, 4F, 54, 20, 46, 4F, 52, 20, 43, 31, 32, 38
ASCII: “AUTOBOOT FOR C128”
90 DATA 00, 00, A2, 20, A0, 0B, 4C, A5, AF, 52, 55, 4E
Contains two zero bytes used as terminator of the boot message (defined on line 80) and the program name (not used), then machine code:
A2 20     LDX #$20
A0 0B     LDY #$0B
4C A5 AF  JMP $AFA5
The values inserted in .X and .Y represent the address immediately preceding the string to be written (for this example the string is located at $0B21, in .Y there is the hi-byte $0B and in .X there is the lo-byte -1 i.e. $20).
52 55 4E in ASCII is “RUN” (BASIC command string). The name of the program to be loaded is defined on line 100:
100 DATA 22, 41, 55, 54, 4F, 42, 4F, 4F, 54, 2D, 43, 31, 32, 38, 22, 00
ASCII: “AUTOBOOT-C128” tra virgolette, poi terminatore 00.
By running this program, the disk’s boot sector is modified to run the “AUTOBOOT-C128” program. Now we need to create this program.
Since this is an example program, just type the commands:
NEW
10 PRINT "AUTOBOOT LOADED SUCCESSFULLY!!"
DSAVE "AUTOBOOT-C128"
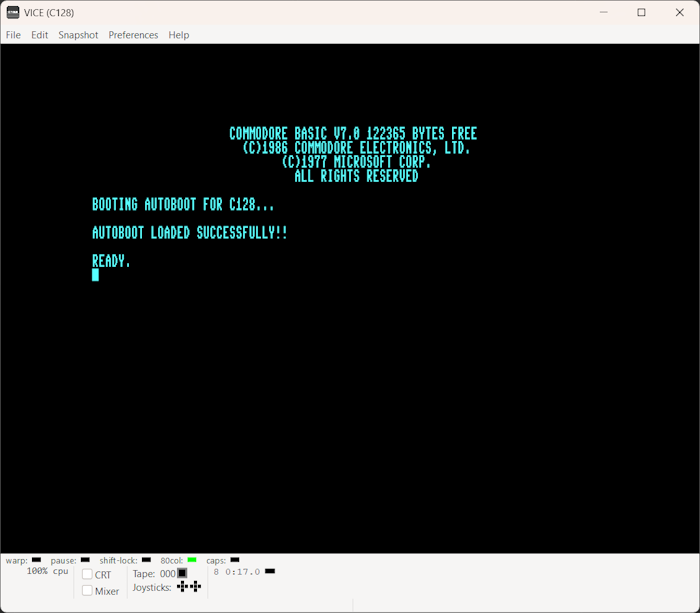
For the C128 autoboot part, we’re done; just call the BOOT command or reset the machine to verify its operation. In this case, the output on an 80-column monitor should look like this:

Autoboot C128 in modalità C64
Autoboot for C64 mode takes into account all the activities performed in the previous step and requires modification of the program launched after booting. To better separate the concepts, the following is the new listing that creates the boot sector. The only differences are the string following the text “BOOTING” and the name of the launched file, which will be called “AUTOBOOT-C64”.
As with the previous example, it is convenient to create a blank disk. This BASIC/ML code creates boot sector:
10 REM CREATE BOOT SECTOR
20 DCLEAR: OPEN 15, 8, 15: OPEN 2, 8, 2, "#": PRINT# 15, "B-P:2, 0"
30 READ D$: D = DEC(D$): IF D>255 THEN 50
40 PRINT# 2, CHR$(D); : GOTO 30
50 PRINT# 15, "U2;2, 0, 1, 0"
60 PRINT DS$ : CLOSE 2 : CLOSE 15
70 DATA 43, 42, 4D, 00, 00, 00, 00
80 DATA 41, 55, 54, 4F, 42, 4F, 4F, 54, 20, 46, 4F, 52, 20, 43, 36, 34
90 DATA 00, 00, A2, 1F, A0, 0B, 4C, A5, AF, 52, 55, 4E
100 DATA 22, 41, 55, 54, 4F, 42, 4F, 4F, 54, 2D, 43, 36, 34, 22, 00
1000 DATA 100
There’s no difference with previous boot sector creator, except for the two things mentioned above.
Next, you need to generate the file (AUTOBOOT-C64) that, when running in 128 mode, prepares the transition to C64 mode and starts the bootloader (“BOOT64”). The bootloader in C64 mode will finally load the desired program. For this example, the program launched in C64 mode will be called “HELLO-WORLD”.
10 A = 32768: PRINT "(SWITCH 40 COLUMN DISPLAY) "
20 READ D$: IF D$ = "-1" THEN GO64
30 POKE A, DEC (D$):A = A + 1: GO TO 20
40 DATA 09, 80, 5E, FE, C3, C2, CD, 38, 30
50 DATA 8E, 16, D0, 20, A3, FD, 20, 50, FD
60 DATA 20, 15, FD, 20, 5B, FF, 58
70 DATA 20, 53, E4, 20, BF, E3, 20, 22, E4
80 DATA A2, FB, 9A
90 DATA A2, 00, BD, 41, 80, F0, 06
100 DATA 20, D2, FF, E8, D0, F5
110 DATA A9, 0D, 8D, 77, 02, 8D, 78, 02
120 DATA A9, 02, 85, C6
130 DATA 4C, 74, A4
140 DATA 0D, 4C, 4F, 41, 44, 22, 42, 4F, 4F, 54, 36, 34, 22, 2C, 38
150 DATA 0D, 0D, 0D, 0D, 0D, 52, 55, 4E, 91, 91, 91, 91, 91, 91, 91, 0, -1
The C128 autoboot program adds some ML code to address $8000 (32768) to simulate a cartridge. Once the code has been added, the GO64 BASIC command is launched.
On the next boot, C64 mode performs a classic reset, checking for any cartridges. At the specified address, it will find the code added by the AUTOBOOT-C64 program. Note that the GO64 command does not erase the RAM, so its contents are preserved.
The code added to simulate a cartridge performs the classic C64 boot activities (IOINIT, RAMTAS, RESTOR, CINT…) to which it adds the writing of the load command on the screen (LOAD”BOOT64”,8) and the simulation of pressing the return key for loading and execution.
At the end of the boot sequence, the BOOT64 program is loaded and started, which has this listing:
10 REM C64 ML PROG LOADER EXAMPLE
20 IF A = 0 THEN A = 1: LOAD "HELLO-WORLD", 8, 1
30 SA = 52224: REM START ADDRESS
40 SYS SA
Finally here is an example listing for “HELLO-WORLD”:
10 PRINT "HELLO WORLD FROM C64!!"
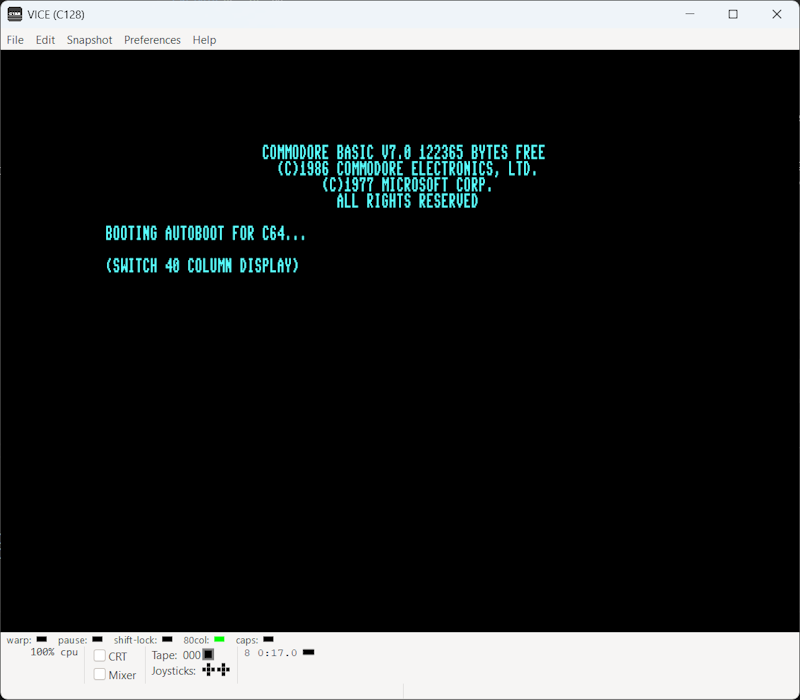
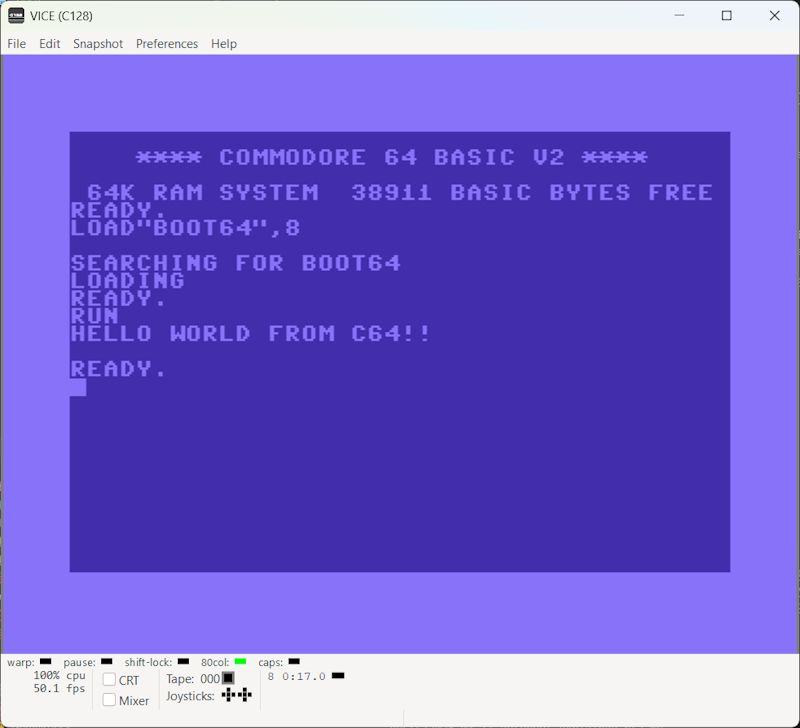
When the C128 restarts and the various steps are completed, the 80-column and 40-column screens should look like this:


Download
Below are links to the images of the two discs: